The following step-by-step instructions should be used to deploy and configure the vCenter Server Appliance.
|
Task ID |
Task Description |
Screenshot |
|
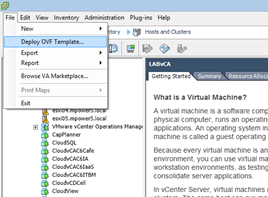
To deploy the vCenter server appliance we follow the standard OVF/OVA deployment process. Select File from the menu and then select Deploy OVF Template… |
|
|
|
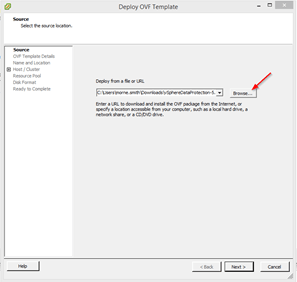
Click the Browse button and browse to the directory where the OVA Appliance file was downloaded to. Select the file. Click Next. |
|
|
|
The version information of the OVA file is displayed. Click Next. |
|
|
|
Enter a name for the vCenter Server Appliance to be deployed. Select the Inventory Location where the Appliance should be located. Click Next. |
|
|
|
Select the cluster to which the Appliance hould be deployed to. Click Next. |
|
|
|
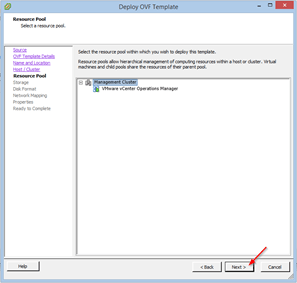
Select the default Resource Pool to which the appliance should be deployed to. Click Next. |
|
|
|
Select the Storage Location where the appliance should be deployed to. Click Next. |
|
|
|
Select the method of provisioning to the storage IE: Thin, Thick Eager Zeroed or Thick Lazy Zeroed. Click Next. |
|
|
|
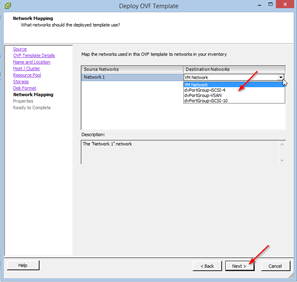
Select the Destination Network the Appliance will be deployed too. Click Next. |
|
|
|
Complete the Appliaction details form with the following details: Hostname: <applianze full fqdn name> Note: type this in all lower case Default Gateway: DNS Server: Network IP Address: the IP of the Appliance Network Mask: The mask for the subnet. Click Next. |
|
|
|
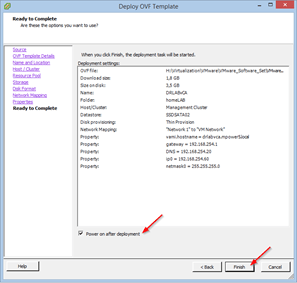
Review the deployment summary. You can select the Radio button to start the Appliance once deployed. Click Next. |
|
|
|
The Appliance is copied to the correct storage. |
|
|
|
A successful deployment message will be displayed. Clock Close to close the window. |
|
|
|
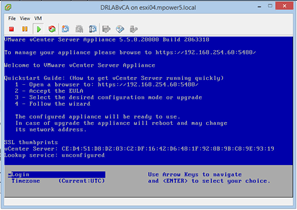
Open a console window to the Appliance VM to ensure the appliance has correctly started up. |
|
|
|
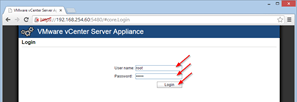
To access the configuration of the Appliance you need to use a browser to access the IP Address or the FQDN. Note: Use Google Chrome, Firefox or the latest Internet Explorer versions. User name: root Password: vmware |
|
|
|
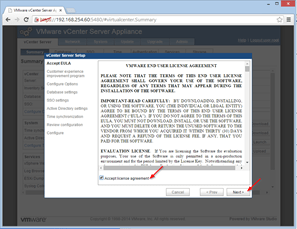
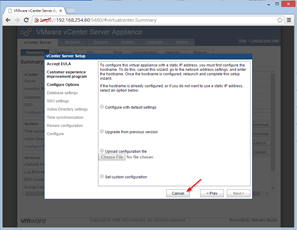
Accept the EULA agreement. Click Next. |
|
|
|
Select the Tick box to particiapte in the Customer User Experience program if you would like. Click Next. |
|
|
|
At this stage we do not want to continue to configure the appliance. Click Cancel. Note: We shall return to this Configuration Wizard. |
|
|
|
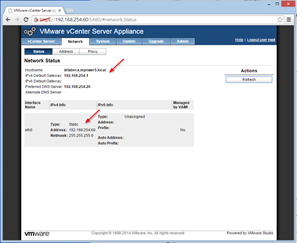
Select the Network Tab. Confirm the Appliance FQDN name and IP Address is correct. |
|
|
|
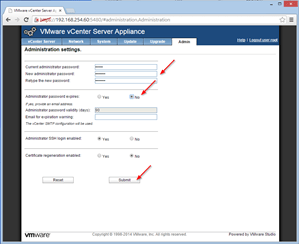
Select the Admin tab. We need to change the Administrator password here. Current Password: vmware New Password: VMware1! Select the No radio button to ensure the Administrator password does not expire. Click Submit. |
|
|
|
Select the Time tab. Select the NTP radio button and complete the NTP address with the correct trusted NTP server IP address. Note: You can use your Domain Controller to serve the time in your envrionment. Click Save Settings. |
|
|
|
Select System tab. Select the Reboot button. This will restart the appliance. Note: a restart is reccomended at this stage to ensure all network settings are correctly applied. |
|
|
|
To access the configuration of the Appliance you need to use a browser to access the IP Address or the FQDN. Note: Use Google Chrome, Firefox or the latest Internet Explorer versions. User name: root Password: VMware1! |
|
|
|
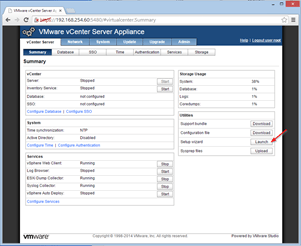
Once logged on, select the vCenter Server tab. Select the Setup Wizard, and click the Launch button. |
|
|
|
The Setup wizard launch. You may select the Tick box to join the Customer Experience program. Click Next. |
|
|
|
Select the Radio button next to Set Custom Configuration. Click Next. |
|
|
|
Use the Embedded Database option here. Click Next. Note: If you wanted to connect to an Oracle Database, you would select it here in the Drop down list and input the required settings. |
|
|
|
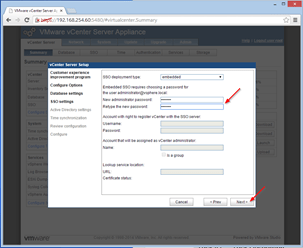
Select the Embedded SSO type. Enter a password fot he SSO Administrator. Password: VMware1! Note: Please take note and recored this password as you will need to use it in future for additional configuration. Click Next. |
|
|
|
We shall for now skip pass the Active Directory configuration settings here. Click Next. |
|
|
|
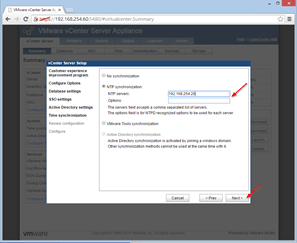
You may need to re-enter the NTP settings here. Select the NTP radio button and complete the NTP address with the correct trusted NTP server IP address. Note: You can use your Domain Controller to serve the time in your envrionment. Click Next. |
|
|
|
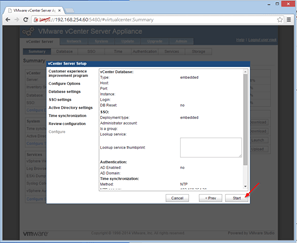
The setup summary is displayed. Click the Start button. |
|
|
|
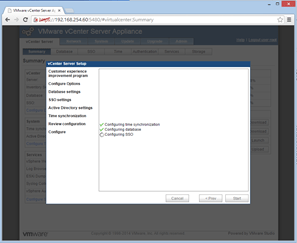
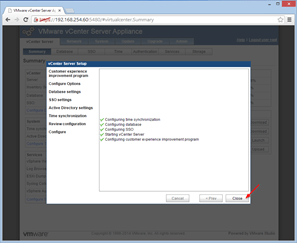
The appliance is configured and the step completed shown. Note: The SSO configuration will take some time. Please DO NOT cancel this process. |
|
|
|
Once all steps are complete, you select Close. |
|
|
|
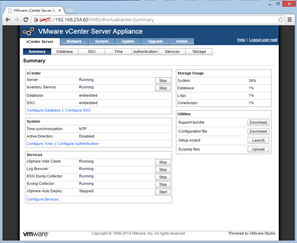
At the vCenter Server tab, the status of all the services are shown. |
|
|
|
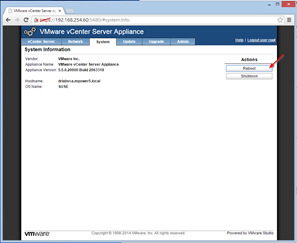
Select System tab. Select the Reboot button. This will restart the appliance. Note: a second restart is reccomended at this stage to ensure all settings are correctly applied. |
|
|
|
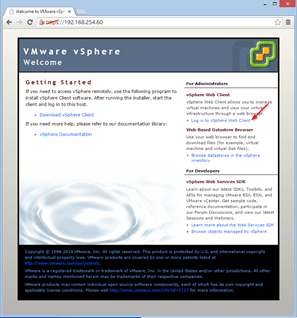
Once the appliance has fully restarted, access the appliance default web page by browsing to: HTTP Address: Https://<fqdn or ip address of appliance> Select the Log on to vSphere Web Client link. |
|
|
|
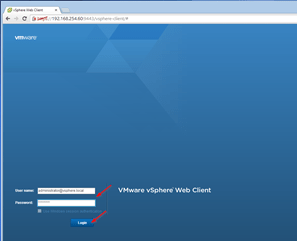
At the Web Client Logon Screen, Type the useranem and password: User Name: administrator@vsphere.local Password: VMware1! Note this is the SSO administrator username and password. |
|
|
|
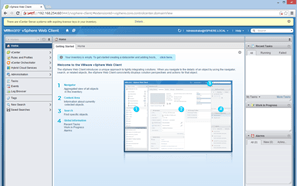
Once you have been logged on, the vCenter Server Web Configuration screen is displayed. You have successfully setup the vCenter Server Appliance! |
|